Learn How to Draw, Process & Outshine the Skill Career
Welcome, aspiring artists, to a world where lines converge, perspectives shift, and dimensions come alive on a blank canvas. Have you ever gazed upon a breathtaking drawing that seemed to leap off the page? Wondered how masterful artists bring their creations to life with depth and realism? Well, get ready to unlock the secrets of perspective and take your drawings from flat to fabulous!
Drawing is more than just putting pen or pencil to paper; it’s about capturing the essence of what you see and translating it into captivating imagery. By understanding the power of perspective, you can break free from two-dimensional limitations and create art that mesmerizes viewers.
In this blog discussion, we will delve deep into the fascinating world of perspective drawing. From mastering linear perspective techniques to incorporating shading, texture, and atmospheric effects – we’ve got all the tools you need to elevate your artwork.
So grab your sketchbook, sharpen those pencils (or stylus), and let’s embark on an artistic journey like no other! Get ready for mind-bending techniques that will have jaws dropping and eyes wide open. It’s time to break boundaries with perspective! Whether you’re an aspiring artist or just looking for a new hobby, learning how to draw can open up a whole realm of creative possibilities. From sketching simple objects to capturing intricate details, drawing allows us to express ourselves in unique and visually stunning ways. In this blog discussion, we’ll take you on an artistic journey as we explore the fundamentals of drawing and provide step-by-step guidance on creating beautiful artwork. But before we dive into the techniques and tips, let’s first understand why learning how to draw is so important.
Drawing not only allows us to create visually appealing pieces but also helps develop our observational skills. By closely observing and analyzing shapes, lines, and forms around us, we train our eyes to see things more deeply. This heightened awareness translates into improved focus and attention to detail – qualities that are valuable not just in art but in various aspects of life.
So whether you dream of sketching your favorite pet or want to bring vibrant flowers onto paper with precision, sharpen your pencil (or grab your stylus) because it’s time for a crash course in drawing! Let’s gather the essential tools needed before getting started.
Understanding the Basics of Linear Perspective
Table of Contents

When it comes to creating depth and realism in your drawings, understanding the basics of linear perspective is essential. Linear perspective is a technique used in art to create the illusion of three-dimensional space on a two-dimensional surface. It allows you to accurately represent objects in proportion and create a sense of depth.
At its core, linear perspective relies on the concept that parallel lines appear to converge as they recede into the distance. This convergence point is known as the vanishing point. By placing objects along these converging lines, you can create the illusion of depth and distance.
To effectively use linear perspective in your drawings, it’s important to understand concepts such as horizon line, eye level, and orthogonal lines. The horizon line represents where the sky meets the ground or any other flat surface in your drawing. The eye level is where your eyes are positioned when viewing an object or scene.
Orthogonal lines are diagonal lines that radiate from points on an object towards the vanishing point(s). These lines help guide you in placing objects correctly within your composition.
By mastering these basic principles of linear perspective, you can bring a new level of realism and depth to your artwork. So grab your pencil and start experimenting with this powerful technique!
Applying the Principles of Perspective in Your Drawings
Understanding and implementing perspective in your drawings can greatly enhance their realism and depth. This technique allows you to create the illusion of three-dimensional space on a two-dimensional surface, making your artwork more visually engaging.
To apply the principles of perspective, start by determining your vanishing point(s) – these are points where parallel lines appear to converge. Use these reference points to establish the horizon line and draw orthogonal lines that recede into the distance.
Next, consider how objects diminish in size as they move away from the viewer. Objects closer to you will appear larger, while those farther away will seem smaller. By accurately depicting this size variation, you can effectively convey depth in your drawings. Additionally, pay attention to foreshortening – a technique used to portray objects that are significantly closer or further away than others within a composition. Mastering foreshortening will add an extra layer of realism and dimensionality to your artwork.
Remember that lighting plays a crucial role in creating realistic perspectives as well. Shadows cast by objects can help define their form and position within space. Understanding light sources and shading techniques will allow you to achieve convincing three-dimensionality in your drawings. By applying proper linear perspective techniques along with shading and value manipulation, you can bring depth and realism into every aspect of your drawing – from landscapes to still lifes or even portraits!
So why not take some time today to practice incorporating perspective into your artwork? With dedication and patience, you’ll be amazed at how much more lifelike and captivating your drawings become!
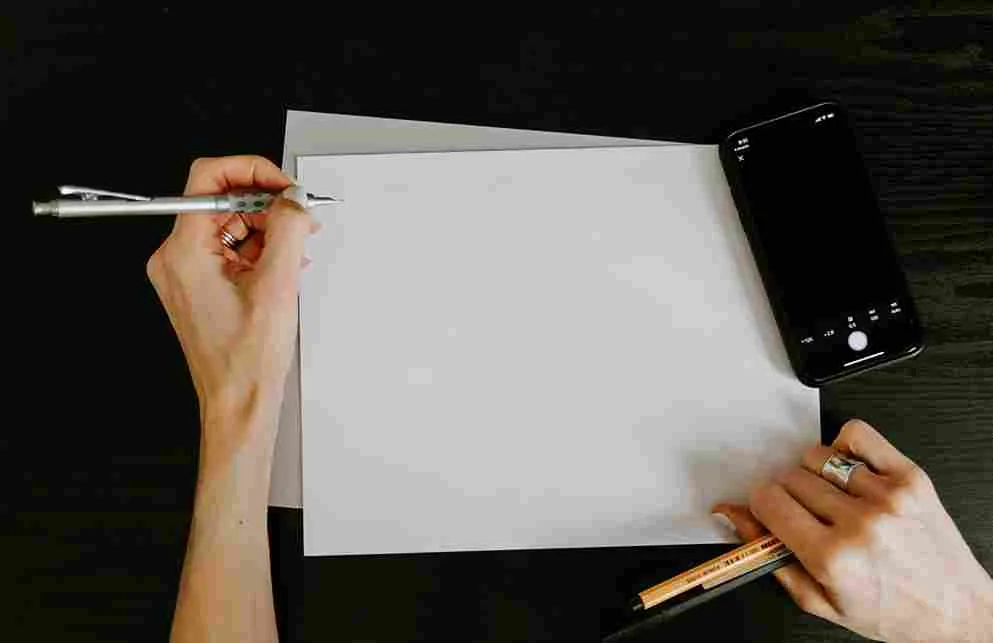
Basic Drawing Materials Needed
When it comes to learning how to draw, having the right materials is essential. While you don’t need anything fancy or expensive to get started, there are a few basic drawing materials that every beginner should have.
First and foremost, you’ll need some paper. A sketchbook with blank pages is ideal for practicing your drawing skills. Look for one that has a heavier weight paper so it can withstand pencil marks without smudging or tearing. Next, you’ll need pencils. A set of graphite pencils in different grades (such as HB, 2B, and 4B) will give you a range of darkness and shading options. You may also want to include a mechanical pencil for finer details.
In addition to pencils, having an eraser is crucial. Look for a kneaded eraser which can be easily molded into different shapes to erase small areas or create highlights. To add depth and dimension to your drawings, consider using charcoal sticks or charcoal pencils. Charcoal produces rich dark tones and can create beautiful contrast in your artwork. Don’t forget about the importance of good lighting! Drawing requires clear visibility and natural light is best whenever possible. If needed, invest in a desk lamp with adjustable brightness settings.
By gathering these basic drawing materials before starting out on your artistic journey, you’ll be well-equipped to explore the world of drawing with confidence!
Importance of Observational Skills in Drawing
Observational skills play a crucial role in the art of drawing. By observing our surroundings and carefully studying the details, we can capture the essence of what we see on paper. These skills are essential for artists to accurately depict objects, people, and landscapes.
When it comes to drawing, observation allows us to notice subtle nuances that might otherwise go unnoticed. It helps us understand how light interacts with different surfaces, the intricate patterns and textures found in nature, or even the unique features that define a person’s face. By sharpening our observational skills through practice, we become more attuned to capturing accurate proportions, shapes, and perspectives. This attention to detail brings depth and realism to our drawings.
Moreover, developing strong observational skills also enhances our ability to interpret what we see creatively. It allows us to infuse our own style into the artwork while still maintaining an element of authenticity. One way to improve your observational skills is by regularly engaging in life drawing sessions or sketching from real-life references. Pay close attention not only to overall shapes but also smaller details such as shadows and reflections.
Additionally, practicing blind contour drawing exercises can help train your eye-hand coordination while encouraging you to rely solely on observation rather than preconceived notions about what you think something should look like. Remember that honing your observational skills takes time and patience. The more you practice looking closely at things around you – whether it be people walking by or everyday objects – the better equipped you’ll be at capturing their essence when putting pencil (or pen) to paper.
So next time you embark on a drawing session, take a moment before starting just simply observe your subject matter closely. You’ll be amazed at how this simple act can transform your artistic expression!
Step-by-Step Guide to Drawing a Simple Object
Drawing is a wonderful way to express your creativity and bring your imagination to life. Whether you’re a beginner or have some experience, learning how to draw simple objects can be a great starting point. In this step-by-step guide, we will walk you through the process of drawing a basic object.
First, choose an object that you find interesting and want to draw. It could be anything from a fruit to a household item. Start by observing the object closely and paying attention to its shape, size, and any distinctive features. Next, lightly sketch the basic outline of the object using simple shapes like circles or rectangles. This will serve as your framework for adding more details later on.
Once you have the basic shape in place, start adding more details gradually. Take it one step at a time and focus on capturing the proportions and contours accurately. Use light shading techniques to add depth and dimensionality to your drawing. Observe how light falls on different parts of the object and use shading strokes accordingly. Continue refining your drawing by adding finer details such as texture or patterns if applicable. Pay attention to small nuances that make each object unique.
Remember that practice makes perfect! Don’t get discouraged if your first attempt doesn’t turn out exactly as expected. Keep practicing regularly, experimenting with different techniques, and exploring new subjects. Drawing is all about observation and patience – take your time with each step of the process and enjoy every moment spent honing your skills!
Keep reading for valuable tips on how to draw effectively, how to add detail and depth to your drawings effectively!
Tips for Adding Detail and Depth to Your Drawings
When it comes to creating drawings that truly stand out, adding detail and depth is key. These elements can take your artwork from flat and simplistic to intricate and captivating. Here are some tips to help you enhance your drawings with more detail and depth.
Pay attention to the smaller details. Whether it’s the texture of a petal or the wrinkles on someone’s face, these subtle nuances can bring your drawing to life. Take time to observe and replicate these details accurately in your artwork. Next, consider using shading techniques. Shadows and highlights can add dimensionality to your drawings by creating the illusion of depth. Practice different shading techniques such as hatching, cross-hatching, and blending to achieve realistic shadows and highlights.
Another way to add depth is by incorporating perspective into your drawings. Understanding perspective will enable you to create accurate proportions and convey a sense of distance in your artwork. Experiment with various perspectives such as one-point or two-point perspective for more dynamic compositions.
Additionally, try layering different elements in your drawing. By overlapping objects or textures, you can create an illusion of space within your composition. This technique helps establish foreground, middle ground, and background elements for a more visually engaging piece. Don’t be afraid to experiment with different mediums or tools for added detail and texture in your drawings. Using pencils with varying softness levels or incorporating ink pens for fine lines can give unique effects that enhance the overall quality of your work.
By implementing these tips into practice regularly, you’ll gradually improve at adding detail and depth in all aspects of drawing – from still life sketches to portraits or landscapes! So grab those pencils (or any other medium) and start exploring new ways.
Creating Depth and Realism with Shading and Value
Creating depth and realism in your drawings goes beyond just getting the perspective right. One crucial element to consider is shading and value. By understanding how light falls on objects, you can bring them to life and make them appear three-dimensional on paper.
Shading involves using different tones of darkness or lightness to represent the way light interacts with objects. This can be achieved by observing where the light source is coming from and applying shadows accordingly.
To create a sense of depth, start by identifying the areas that would receive less direct light, such as crevices or recessed parts of an object. These areas will typically be darker compared to those directly hit by the light source.
Gradually build up layers of shading using techniques like cross-hatching or stippling, which involve creating patterns with parallel lines or dots respectively. Varying the pressure applied to your pencil can also help achieve different shades and textures. Consider using a range of values from dark to light in your drawing for a more realistic effect. This contrast between highlights and shadows adds dimensionality and brings out details in your artwork. Remember that practice makes perfect when it comes to shading and value. Experiment with different techniques, study how real-life objects interact with light, and continue honing your skills through regular drawing sessions.
By mastering shading and value techniques, you’ll be able to add depth and realism to your drawings, making them visually engaging for viewers while showcasing your artistic prowess!
Incorporating Atmospheric Perspective for a Realistic Effect
Incorporating atmospheric perspective is a powerful technique that can add depth and realism to your drawings. By understanding how the atmosphere affects our perception of objects in space, you can create stunningly realistic landscapes and scenes.
Atmospheric perspective is based on the principle that as objects recede into the distance, they appear less detailed, lighter in value, and often have a bluish tint. This is due to the scattering of light by particles in the air, creating an illusion of depth. To incorporate atmospheric perspective into your drawings, start by establishing a horizon line. This will serve as a reference point for determining how objects will be affected by distance. As objects move farther away from the viewer, make them progressively lighter in value and less detailed. You can also add subtle hints of blue or gray to signify their placement within the atmosphere.
Another way to enhance atmospheric perspective is through overlapping elements. As objects overlap each other, it creates a sense of depth and helps reinforce the illusion of distance. Additionally, varying sizes can also contribute to this effect – smaller objects appearing farther away while larger ones seem closer. Textures should also be considered when incorporating atmospheric perspective. Objects closer to us tend to exhibit more detail and texture compared to those in the background which may appear smoother or softer.
Experimenting with different perspectives can also result in unique drawing compositions that capture attention. Consider exploring bird’s-eye view or worm’s-eye view angles for interesting visual effects that challenge traditional perspectives.
By practicing these techniques consistently over time you’ll refine your skills in incorporating atmospheric perspective effectively into your drawings!
Adding Texture and Detail to Enhance Realism
When it comes to creating realistic drawings, adding texture and detail is key. These elements not only enhance the overall realism of your artwork but also add depth and dimension that can make your drawing come alive.
One way to add texture is through careful observation and replication of different surface textures. Whether it’s the roughness of a tree bark or the smoothness of glass, paying attention to these details will bring authenticity to your drawing. Use various techniques such as cross-hatching, stippling, or even smudging with a blending stump to create different textures. Another important aspect in enhancing realism is capturing small details. Zooming in on specific areas of your subject allows you to focus on intricate textures like fur or wrinkles. Take time to study these details closely and recreate them with precision.
Using different tools can also help you achieve texture and detail in your drawings. Experiment with various pencils, charcoal, pastels, or even ink pens to see which medium works best for you in capturing those fine lines and tiny details. Remember that practice makes perfect when it comes to adding texture and detail. The more you draw from real-life references or photographs, the better you’ll become at replicating intricate textures accurately.
So next time you’re working on a drawing that requires realism, don’t forget about adding texture and detail. These elements are what separate ordinary drawings from extraordinary ones!
Common Mistakes and How to Avoid Them
Drawing, like any other skill, requires practice and patience. It’s natural to make mistakes along the way, but knowing what common errors to watch out for can help you improve your drawing skills faster. Here are a few pitfalls to avoid:
1. Proportions: One of the most common mistakes beginners make is getting proportions wrong. Whether it’s drawing a face or a flower, accurately capturing the size and placement of each element is crucial. Take time to observe and measure before putting pencil to paper.
2. Lack of detail: Adding details brings life and depth to your drawings; however, overdoing it can lead to cluttered or messy artwork. Find a balance between too much and too little detail by focusing on key features that define the subject.
3. Ignoring values: Value refers to the range from lightest to darkest in an artwork. Neglecting values can result in flat-looking drawings lacking dimensionality. Practice shading techniques such as cross-hatching or stippling to create depth.
4. Fear of mistakes: Many artists fear making mistakes so much that they become hesitant with their strokes or overly critical of every line they draw. Remember that art is subjective; embrace imperfections as part of your unique style.
5. Not practicing regularly: Like any skill, consistency is key when learning how to draw effectively. Set aside regular practice sessions even if it’s just for 15 minutes a day – this will help you progress faster.
By being aware of these common mistakes and taking steps towards avoiding them, you’ll see improvement in your drawing abilities over time! Keep experimenting, stay open-minded, and enjoy the process of creating art.
Expand Your Skills: Learning Different Techniques and Styles
Drawing is not just about replicating what you see, but also about expressing your own unique style and creativity. Once you have mastered the basics of drawing, it’s time to explore different techniques and styles to further enhance your skills.
One way to expand your drawing skills is by experimenting with different mark-making techniques. This can include using various pencils, pens, or even unconventional tools like charcoal or ink. Each medium has its own distinct qualities that can add depth and texture to your drawings.
Another technique worth exploring is shading. By mastering shading techniques such as hatching, cross-hatching, stippling, or blending, you can create realistic effects and bring a sense of three-dimensionality to your drawings.
Furthermore, learning different styles of drawing can help you develop a visual language that suits your interests and preferences. From realism to impressionism or even abstract art – there are endless possibilities for self-expression through various artistic styles.
To learn new techniques and styles effectively, consider taking online courses or joining local art workshops where experienced artists share their knowledge. Additionally, studying the works of famous artists across history can provide inspiration for discovering new approaches in drawing.
Remember that expanding your skills in drawing is an ongoing process; don’t be afraid to experiment and push yourself out of your comfort zone. The more you practice different techniques and explore diverse artistic styles, the more versatile and confident you will become as an artist.
Resources for Further Learning and Inspiration
When it comes to learning how to draw, there are countless resources available that can help you improve your skills and find inspiration. Whether you prefer books, online tutorials, or in-person classes, there is something out there for everyone.
One popular resource for aspiring artists is YouTube. There are many talented artists who share their techniques and tips on the platform, making it a great place to learn new drawing methods. Additionally, websites such as Skillshare and Udemy offer a wide range of online courses specifically tailored to different skill levels.
If you’re more of a hands-on learner, consider joining an art workshop or enrolling in a local drawing class. Not only will you have access to an experienced instructor who can provide valuable feedback and guidance, but you’ll also have the opportunity to meet fellow artists and exchange ideas.
For those who prefer self-study, books can be an invaluable resource. There are numerous instructional books available that cover various aspects of drawing including anatomy, perspective, shading techniques, and more. Visit your local library or bookstore to explore the vast selection of titles available.
Additionally, don’t underestimate the power of observation when it comes to learning how to draw. Study the work of master artists both past and present by visiting museums or browsing through art galleries online. Pay attention not only to their technique but also their use of composition and color.
In conclusion… To truly excel at drawing requires continuous practice coupled with exposure to different styles and techniques. By utilizing these resources for further learning and inspiration mentioned above – whether through online tutorials on platforms like YouTube or by attending workshops/classes – you’ll be well on your way towards becoming a better artist.
The Benefits of Learning How to Draw
Drawing is not just a hobby or a form of artistic expression, it also comes with numerous benefits for our overall well-being. Learning how to draw can enhance our creativity and problem-solving skills, while providing us with a sense of relaxation and mental clarity.
One of the key benefits of learning how to draw is the improvement in hand-eye coordination. As we practice drawing, our hand movements become more precise and controlled, allowing us to translate what we see onto paper with greater accuracy. Additionally, drawing helps to sharpen our observational skills. We learn to pay closer attention to details such as shapes, lines, and proportions. This heightened observation extends beyond art and can be applied in various aspects of life, helping us become more attentive individuals.
Drawing also provides an outlet for self-expression and emotional release. It allows us to communicate thoughts and feelings that may be difficult to put into words. Through art, we can explore different emotions, perspectives, and experiences. Furthermore, engaging in regular drawing exercises stimulates the brain’s creative thinking processes. It encourages us to think outside the box and explore new possibilities. This creativity carries over into other areas of life where innovative solutions are required.
Lastly but certainly not least important – drawing has been found to have therapeutic effects on stress reduction and anxiety management. The act of focusing on creating something visually appealing can help quieten the mind from daily worries while promoting mindfulness.
In conclusion (never use this phrase), learning how to draw offers countless benefits for both personal growth and mental well-being alike! Whether you’re a beginner or an experienced artist looking for new challenges (avoid repetitive topics), picking up a pencil (repetitive word) will undoubtedly bring positive changes into your life.
The basic tools you need to get started
When it comes to learning how to draw, having the right tools can make all the difference. While you don’t need fancy equipment to get started, there are a few basic materials that will help set you up for success.
First and foremost, you’ll need some quality drawing pencils. These come in various grades of hardness and softness, allowing you to create different types of lines and shading. A set of graphite pencils ranging from 2H (hard) to 6B (soft) is a good place to start. Next, invest in a sketchbook or drawing pad. Look for one with acid-free paper that can handle pencil work without smudging or tearing easily. The size is up to personal preference – some artists prefer larger pages for more detailed work while others find smaller sizes easier to carry around.
To accompany your pencils and sketchbook, pick up an eraser or two. A kneaded eraser is great for lifting graphite off the page gently without leaving residue behind. You may also want a vinyl eraser for more precise corrections. Consider getting a pencil sharpener and some blending tools like tortillons or blending stumps. These will help achieve smooth transitions between light and dark areas in your drawings.
Remember, these are just the basics! As you progress in your artistic journey, you may discover new tools that suit your style better. Experimentation is key when it comes to finding what works best for you as an artist.
Understanding the fundamentals of drawing (line, shape, form)
Understanding the fundamentals of drawing lays a strong foundation for creating beautiful and realistic artwork. It is like learning the alphabet before writing a story. These fundamental elements include line, shape, and form.
Line is one of the most basic tools in drawing. It can be used to create outlines, define shapes, and add details to your artwork. Experimenting with different types of lines – straight, curved, thick, thin – can bring depth and dimension to your drawings.
Shape refers to the two-dimensional representation of an object or subject. By identifying various shapes within an image or scene, you can accurately render them on paper. Understanding how shapes interact with each other helps in capturing proportions and perspectives.
Form adds three-dimensionality to your drawings by considering light and shadow. It involves understanding how objects appear solid rather than flat surfaces. Shading techniques such as hatching or cross-hatching are commonly used to depict form convincingly.
By mastering these fundamentals – line, shape, and form – you will have a solid base for exploring more complex subjects and styles in drawing. So grab your pencil and start practicing!
Using Overlapping and Size Variation to Convey Depth
Using overlapping and size variation is a powerful technique for creating depth in your drawings. By strategically placing objects in front of or behind one another, you can give the illusion of distance and three-dimensionality.
Overlapping occurs when one object partially obscures another. This simple concept helps to establish a sense of space and hierarchy within your composition. Objects that overlap others appear closer to the viewer, while those being overlapped recede into the background.
Size variation also plays a crucial role in conveying depth. Objects that are closer to the viewer should be drawn larger, while those farther away should be smaller. This mimics how our eyes perceive objects in real life, where things close by appear larger and more detailed compared to distant objects.
By combining overlapping and size variation techniques, you can create realistic spatial relationships between different elements in your drawing. Experiment with these concepts to add depth and dimensionality to your artwork!
Utilizing Foreground, Middle Ground, and Background in Your Composition
When it comes to creating depth and realism in your drawings, understanding how to effectively use the foreground, middle ground, and background is essential. By incorporating these elements into your composition, you can bring a sense of dimensionality that captivates the viewer.
In the foreground, you have the opportunity to draw objects or subjects that are closest to the viewer. This area often sets the stage for your drawing and helps create a sense of proximity. Whether it’s a tree branch reaching out towards us or a person standing right in front of us, using details and bold lines can add impact.
Moving into the middle ground allows for more intricate details and subtle variations in value. This area acts as a bridge between the foreground and background, helping guide our eyes deeper into the composition. Consider adding elements like buildings or foliage here – objects that provide context without overpowering.
And finally, we come to the background how to draw – where distant landscapes or cityscapes reside. Softening edges and reducing detail at this point creates an atmospheric effect known as aerial perspective. The colors become less saturated as they recede into space while also appearing lighter due to atmospheric haze.
By strategically placing objects within each zone – carefully considering size variation and overlapping – you can create a realistic representation of space on paper! So next time you’re working on a drawing, remember to consider how utilizing foregrounds, midgrounds, and backgrounds will enhance depth!
Experimenting with Foreshortening Techniques
Foreshortening is a powerful technique that can add depth and realism to your drawings by creating the illusion of objects receding into space. It involves distorting the proportions of an object or figure to accurately represent its appearance when viewed from a specific angle.
One way to experiment with foreshortening is by studying photographs or life models from unusual angles. Instead of relying on the typical front-on view, try drawing from above or below, capturing the unique perspective and distortion that occurs in these positions how to draw.
Another approach is to exaggerate foreshortening for dramatic effect. By pushing the distortion even further, you can create dynamic compositions that grab attention and convey a sense of movement. This technique is often used in action-packed illustrations or comic book art.
Additionally, playing with different mediums and styles can enhance your exploration of foreshortening techniques. Experiment with using bold lines and strong contrasts to emphasize the distorted shapes created by foreshortening. Alternatively, try using soft shading techniques to capture subtle shifts in form and volume.
Remember, practice makes perfect when it comes to mastering foreshortening. Start by sketching simple objects from various viewpoints before moving on to more complex subjects like figures or landscapes. The key is observation – closely study how objects appear when seen from different angles and apply those insights to your drawings.
By experimenting with foreshortening techniques, you’ll not only expand your artistic skills but also bring an exciting visual impact to your artwork. So don’t be afraid to break free from traditional perspectives and explore new horizons in your drawings!
Exploring Different Perspectives for Unique and Interesting Drawings
When it comes to creating truly unique and interesting drawings, one way to break free from the ordinary is by exploring different perspectives. By experimenting with various viewpoints, you can add a captivating twist to your artwork.
Instead of always drawing from eye level or a straight-on perspective, try looking at your subject from above or below. This change in angle can instantly transform an ordinary scene into something extraordinary. Imagine capturing the hustle and bustle of a city street from a bird’s-eye view or gazing up at towering skyscrapers as if you were lying on the ground.
Another approach is to play with unconventional vantage points. Instead of always depicting objects in their usual size and proportion, why not exaggerate certain elements? Enlarge the foreground while shrinking the background to create a sense of depth and drama in your composition.
You can also experiment with incorporating multiple viewpoints within one drawing. This technique allows you to showcase different angles simultaneously, giving viewers an unexpected visual experience. For example, imagine drawing a portrait where one eye is seen head-on while the other is depicted in profile – this adds intrigue and complexity.
Don’t limit yourself to just realistic representations either! Abstracting your subjects can open up endless possibilities for exploration. Embrace distortion, fragmentation, or even cubism-inspired techniques to challenge traditional notions of perspective.
By stepping outside conventional perspectives and embracing new ways of seeing things, you can infuse your artwork with freshness and originality that will captivate both yourself as well as those who view it.
How to improve your Observational Skills
Observational skills are crucial when it comes to drawing. They allow you to accurately capture the details and nuances of your subject, resulting in more realistic and compelling artwork. So, how can you improve your observational skills?
Take the time to really look at your subject. Observe its shape, texture, and proportions. Notice the small details that make it unique.
Next, practice drawing from life as much as possible. Whether it’s a still life arrangement or a person sitting for a portrait, drawing from observation helps train your eye to see things more accurately.
Another helpful exercise is blind contour drawing. This involves looking solely at your subject while keeping your eyes on the paper and not lifting the pen or pencil. It may sound strange but this technique can help develop hand-eye coordination and enhance your ability to perceive shapes and lines.
Additionally, try sketching quickly without worrying about making a perfect representation. Quick sketches encourage you to focus on capturing the essence of what you’re observing rather than getting caught up in every detail. 8 Powerful Tips for Car Body Maintenance
Don’t be afraid to experiment with different mediums or techniques when practicing observation skills. Working with charcoal or ink instead of pencil can offer new challenges that push you out of your comfort zone.
By regularly honing and improving these observational skills through dedicated practice sessions, you’ll find yourself becoming more attuned to the world around you – which will undoubtedly translate into better drawings!
Tips for practicing and honing your skills
1. Consistency is key: Make drawing a regular part of your routine. Set aside dedicated time each day or week to practice. This will help you build momentum and improve your skills over time.
2. Start with simple exercises: Begin by sketching basic shapes, lines, and forms. This will help you develop your hand-eye coordination and understanding of proportion.
3. Experiment with different mediums: Don’t limit yourself to just pencil and paper. Explore other art supplies like charcoal, pastels, or even digital tools. Each medium offers its own unique challenges and opportunities for creativity.
4. Seek feedback from others: Share your drawings with friends, family, or online communities of artists. Constructive criticism can provide valuable insights on areas where you can improve.
5. Study the work of others: Look for inspiration in the works of established artists across different styles and genres. Analyze their techniques and try incorporating them into your own practice.
6. Explore different subjects: Challenge yourself by drawing a variety of subjects such as landscapes, animals, still life objects, or portraits. This will help you develop a well-rounded skillset.
7. Be patient with yourself: Remember that improvement takes time and effort. Don’t get discouraged if some drawings don’t turn out as expected. Use setbacks as learning opportunities to grow as an artist.
8. Enjoy the process: Drawing should be enjoyable! Embrace mistakes as part of the learning journey,and celebrate small victories along the way.
Whether it’s mastering a new technique or capturing a likeness perfectly, savor every step forward in your artistic development.
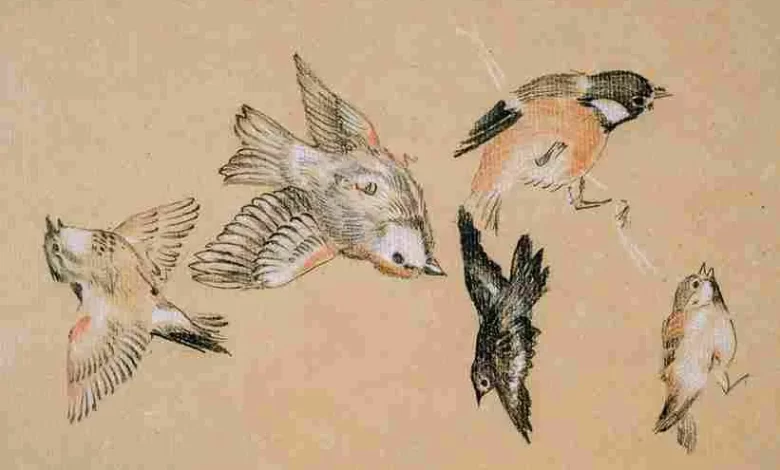
Drawing different subjects (people, landscapes, still life)
Drawing different subjects can be both challenging and rewarding. Each subject presents its own unique set of challenges, allowing you to explore various techniques and styles. When it comes to drawing people, capturing the essence of their features and expressions is key. Pay attention to proportions, shading, and details such as facial expressions or body language.
Landscape drawing requires a keen eye for observation. Study the way light interacts with nature, creating shadows and highlights. Experiment with different textures to bring your landscapes to life.
Still life drawings allow you to arrange objects in interesting compositions. Start by selecting objects with varying shapes, sizes, and textures. Consider how they interact with each other in terms of lighting and perspective.
No matter what subject you choose, remember that practice makes perfect. Set aside dedicated time each day or week to draw from life or reference photos. Don’t be afraid to make mistakes; they are part of the learning process.
Explore different mediums like pencils, charcoal or ink pens for varied effects on your drawings too!
So go ahead, experiment with different subjects in your drawings! It’s a great way to expand your skills as an artist while expressing yourself creatively.
Resources for further learning and inspiration
When it comes to learning how to draw, there is always room for growth and improvement. Luckily, there are plenty of resources available to help you continue your artistic journey. Whether you prefer books, online tutorials, or attending workshops, there is something out there for everyone.
One excellent resource for further learning and inspiration is art websites and blogs. These platforms often feature step-by-step tutorials, artist interviews, and galleries of artwork from various styles and mediums. They can provide valuable insights into different techniques and offer a source of motivation when you’re feeling stuck.
Another option is joining an art community or forum. Engaging with other artists can be incredibly beneficial as you can learn from their experiences, receive constructive feedback on your work, and find new sources of inspiration.
Art books are also a great tool for expanding your knowledge in drawing. Look for titles that focus on specific subjects or techniques that interest you the most. Many books include exercises and prompts to practice what you’ve learned.
If hands-on learning is more your style, consider attending workshops or classes either in-person or online. These interactive environments allow you to learn directly from experienced artists who can guide you through various drawing techniques while providing personalized feedback on how to draw.
Don’t forget about the power of observation in everyday life! Take time to study the world around you – examine shapes, colors, lightings – everything that catches your eye may become a potential subject matter for future drawings!
In conclusion (this section does not conclude), never underestimate the value of continuous learning when it comes to drawing! With so many resources available at our fingertips today (thanks Internet!), we have endless opportunities to improve our skills and find inspiration along the way.
Breaking Free from Traditional Perspectives: Abstract and Surreal Drawing
When it comes to drawing, there are no limits to the imagination. And that’s where abstract and surreal drawing techniques come into play. These unconventional approaches allow artists to break free from traditional perspectives and create truly unique and thought-provoking pieces.
In abstract drawing, the focus is not on creating a realistic representation of objects or scenes. Instead, it’s about capturing emotions, ideas, or concepts through shapes, lines, and colors. By distorting reality and embracing spontaneity, abstract drawings can evoke a wide range of feelings in the viewer.
Surrealism takes this concept even further by blending dreamlike elements with reality. It aims to challenge our perception of the world by combining unrelated objects or situations in unexpected ways. Through symbolism and juxtaposition, surreal drawings encourage viewers to question their understanding of the rational world.
Both abstract and surreal drawing offer artists endless possibilities for self-expression. They provide an avenue for exploring unconventional compositions, experimenting with unusual color palettes, or playing with textures that defy traditional artistic norms.
By breaking free from traditional perspectives in art-making processes like abstraction and surrealism allows us as creators to tap into our innermost thoughts and emotions without limitations. It encourages us to think outside the box while pushing boundaries within ourselves artistically.
So if you’re looking for a way to break away from conventional artistic norms – give abstract or surrealist drawing a try! Embrace your creativity fully without constraints! You never know what incredible worlds you might uncover when you let go of traditional perspectives! The only limit is your own imagination!
Practicing and Refining Your Perspective Drawing Skills
Now that you understand the basics of perspective and have learned various techniques to create depth and realism in your drawings, it’s time to put those skills into action. The key to becoming proficient in perspective drawing is practice.
Start by sketching simple objects or scenes from everyday life. Pay close attention to the lines and angles that convey depth and distance. Practice drawing different perspectives, such as looking up at a tall building or down at a winding road.
Don’t be afraid to make mistakes – they are an essential part of the learning process. Take note of areas where you struggle and use them as opportunities for growth. Experiment with different shading techniques, textures, and details to enhance the realism of your drawings.
Seek feedback from others who share your passion for art. Join online communities or local art groups where you can exchange tips, advice, and constructive criticism. Engaging with fellow artists will not only help refine your skills but also provide inspiration for new ideas.
Consider incorporating technology into your practice routine too. There are numerous digital tools available that can assist in honing perspective skills through virtual simulations or interactive tutorials.
Remember that mastering perspective drawing takes time, patience, dedication, and most importantly – consistent practice! So keep pushing yourself outside of your comfort zone, exploring unique perspectives, challenging traditional approaches — this is how true progress is made!
By continually practicing and refining your perspective drawing skills over time while maintaining curiosity about new techniques and artistic possibilities—your abilities will grow exponentially! Keep experimenting with different subjects & styles; allow yourself room for creativity without being confined by any preconceived notions.
Conclusion
In this discussion, we have explored the wonderful world of drawing and learned how to create beautiful artwork. Whether you are a beginner or an experienced artist looking to expand your skills, drawing is a fulfilling and rewarding hobby that allows you to express your creativity.
By following the step-by-step guide discussion, you can learn how to draw various objects such as a dog, rose, cat, dragon, flower, nose, and eyes. These basic techniques will provide a strong foundation for your artistic journey.
Remember that drawing is not just about creating accurate representations of objects; it is also about developing observational skills and adding depth and detail to your drawings. By practicing regularly and being patient with yourself, you can improve your abilities over time.
Additionally, don’t limit yourself to one subject matter or style. Explore different techniques and experiment with various subjects like people portraits or landscapes. This will help you grow as an artist and discover new ways of expressing yourself through art.
To further enhance your drawing skills, there are many resources available online including tutorials, books on technique and theory, as well as communities where artists share their work for inspiration. Take advantage of these tools to continue learning and expanding your creative horizons.
So whether you aspire to be the next great illustrator or simply enjoy the therapeutic benefits of putting pencil to paper – keep exploring the world of drawing! With practice and dedication,you’ll see continuous improvement in both technical skill and artistic expression.
By now, you have learned about the power and importance of perspective in creating depth and realism in your drawings. Whether you are a beginner or an experienced artist, incorporating perspective techniques can elevate your artwork to new heights.
Remember, understanding the basics of linear perspective is crucial. By mastering concepts such as vanishing points and horizon lines, you can create accurate and convincing representations of three-dimensional space on a two-dimensional surface.
Applying these principles in your drawings will allow you to accurately depict objects’ size and placement relative to each other, resulting in a more realistic representation. Don’t forget the impact that shading and value can have on adding depth to your work – by using highlights, midtones, and shadows effectively, you can bring your drawings to life. Incorporating atmospheric perspective adds another layer of realism. By fading objects as they recede into the distance due to factors like haze or air pollution, you create a sense of depth that mimics how we perceive our surroundings in real life.
Texture and detail also play vital roles in enhancing realism. Experimenting with different mark-making techniques can help evoke various textures – from rough surfaces to smooth finishes – providing visual interest while conveying tactile information. Don’t be afraid to explore different perspectives for unique and interesting compositions. Try experimenting with extreme angles or foreshortening techniques for dynamic results that captivate viewers’ attention.
For those looking for something beyond traditional perspectives, abstract and surreal drawing offer endless possibilities. Breaking free from conventional rules allows artists to push boundaries creatively while still conveying emotions or ideas effectively through their art. However complex it may seem at first glance, practicing regularly is key to refining your skills. Like any technique, perspective requires time, dedication, and patience to master. So keep practicing!
Now grab those pencils, dive into the artistry, and let your imagination flow on canvas! Happy Drawing!